Category Archives: How To Instructions

How to make stained glass stepping stones.

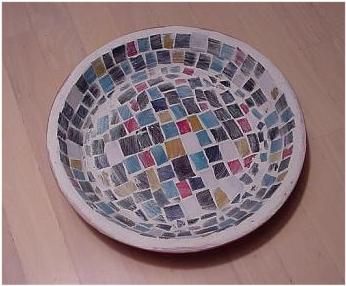
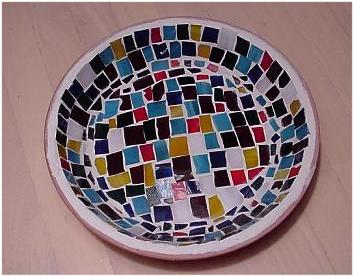
How to Make a Stained Glass Mosaics Bowl – Direct Method


Creating a Mosaic Bowl using the Direct Application Method

GETTING STARTED

The process of making mosaics is actually very simple and consists of just a few simple steps. These steps are as follows:

1. Pre-planning your project
2. Choosing your design
3. Laying out your design
4. Cutting your mosaic pieces
5. Gluing down your glass
6. Applying grout to your project
7. Removing excess grout & cleaning up

The following examples are done without a pattern. If a pattern was to be used it would be traced onto the inside of the ceramic bowl and would guide the placement of the mosaic pieces.

Pre-planning your project

You will first need to decide what you are going to apply your mosaic glass to. This object is referred to as the project surface. It can be almost anything that is solid and that glass will adhere to. Flat surfaces are easiest to work with but rounded surfaces can be used as well. Beginners should start with something simple such as a solid pot holder or a stepping stone. Once you are experienced you can apply mosaic glass to stepping stones, bird baths, garden benches, mail boxes, picture frames, clocks, front porches, walls, floors, pool steps, border stones, bird houses, bricks, and many, many other surfaces.

Choosing your design

As with any work of art you must first decide what design or pattern you are going to use. Almost any stained glass pattern will work for mosaics and there are thousands of patterns to choose from.

You also have the choice of drawing your own pattern on a piece of paper or drawing a pattern directly on the project surface. In any event, using a pattern will give you better results as far as the look of your finished product and will make it easier to place your mosaic pieces.

If you choose to use what we call the freestyle or random layout method, you should at least use a picture or drawing of the design you are trying to create as a reference.

Laying out your design

There are two methods of mosaic application, direct and indirect. Both are outlined below and each method has its advantages.

Direct Method – The direct method involves tracing or drawing the pattern onto the project surface and then gluing the pieces onto that surface using mosaic glue.

If the project surface is flat then carbon paper can be used. First take a piece of carbon paper and lay it onto the project surface. Then take your pattern and lay it over the carbon paper. Using a pencil, trace the pattern onto the project surface. If necessary, when you are done, take a marker and go over the carbon outline until it is clearly visible

If the surface is such that the pattern cannot be transferred with carbon paper then the pattern must be drawn by hand onto the surface. If possible use a ruler or flexible tape measure.

For example, if you were laying out an irregular shaped flower pot or vase and were planning a simple side by side tile design you would take a ruler and draw grid lines every inch or so as a guide. If you were going to integrate a 3″ x 3″ rose pattern in your design you would use a pattern and carbon paper for that portion.

The direct method is used for horizontal surfaces and is nice in that once the pattern is traced onto the project surface you can glue one piece at a time taking all the time you need.

Freestyle or random placement is only recommended on very small pieces where the design is simple. Whenever possible, especially on intricate designs, use a pattern.

Indirect Method – The indirect method utilizes clear contact paper which is laid over the pattern with the sticky side up. The glass pieces are pressed onto the contact paper using the underlying pattern as a guide. When laying out your design, make sure you leave a 1/8 inch gap between pieces for your grout.

This method is useful for vertical surfaces like walls. Since the pieces are attached to the contact paper they can be glued vertically without pieces slipping. The disadvantage to this method is that all the pieces will be applied at the same time which is a little tricky.

Applying the glass using this method is discussed below.

Cutting your mosaic pieces

Refer to the section above on cutting glass

Gluing down your glass

Direct Method – There are several different types of glue that can be used for mosaics. (several are listed in the materials section above) The glue you use should be compatible with glass, should be waterproof when dry, and should dry clear so that it won’t show through the glass and so that it won’t cover up your pattern lines when first applied. For horizontal surfaces it is not necessary for the glue to dry fast but in more vertical applications a faster drying glue is a must.

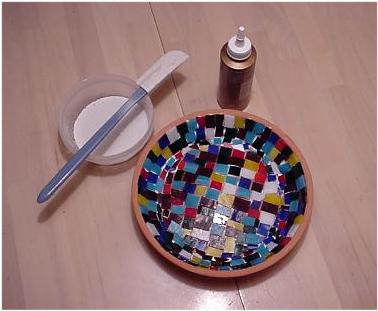
Using a glue spreading tool, apply a layer of Mosaic Adhesive onto the project surface. (TIP: Be careful not to over apply your glue. If you fill in the areas between the pieces with glue there will be no room for your grout.) Carefully place your mosaic pieces onto the project surface making sure to leave a 1/8 inch gap between pieces. Firmly press each piece in place. Work within a small area at a time for best results. Once all the pieces are in place allow the adhesive to fully set before proceeding. Once the pieces are set you are ready to go on to the next step.

Applying Grout to your project

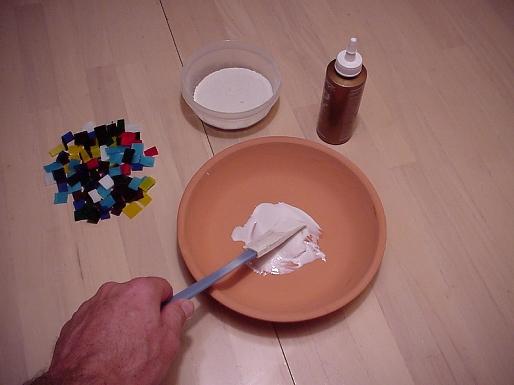
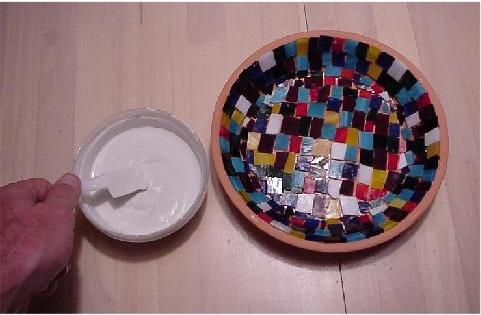
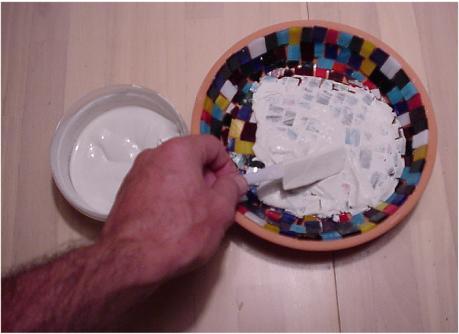
Mix up a batch of grout and using a grout applicator tool, spread it onto the tiles. (TIP: Auto body repair stores carry a great selection of spreading tools that are perfect for spreading grout.) Work the grout into the crevices until the grout is smooth and level with the tile surface. After using the spreader a paint brush can be used to work the grout thoroughly into all the crevices.

Removing excess Grout and cleaning up

After the grout has partially dried, wipe off the excess with a damp scrub sponge. When the grout has thoroughly dried, polish the tile surface with a damp paper towel or sponge until tiles are shiny and free of grout residue.

Congratulations! You’re ready to use and admire your new mosaic masterpiece.

Sealing Your Garden Stepping Stone

After your stone has cured you will need to seal it with a penetrating sealer made for marble or grout. You can find this at Lowes or Home Depot in the tile department. Simply rub it into the top and sides of the stone using a cloth. You do not need to seal the bottom as it needs to breath. Sealing your stone will accomplish several things. First, it will keep water from penetrating the stone and then freezing during the winter. Second, it will lock out dirt and help keep your stone cleaner. You will be able to wipe dirt off the stone easier. Third, it can add gloss or enhance the color of the cement if you wish. There are several types of sealer and some are offered in a gloss or semi gloss.

The widget below contains molds, stepping stone patterns, diamondcrete and a nice pattern resize program.

Removing your Stained Glass Garden Stone From the Mold

Once you stone has hardened you are ready to remove it from the mold.  Different formulas of cement take different times to harden. If you use a quick dry cement or an accelerator it will harden quicker.  You will be able to test the hardness using your fingernail.  If it feels like stone it is ready.  I normally let mine sit overnight.  In the video below a week is recommended. The main thing is to not remove it from the mold until it is completely hard.  If you do it will fall apart.

To remove the stone from the mold just lay down a towel and flip the mold over onto the towel. Pull on the edges of the mold gently all the way around and push gently on the back of the mold until you feel the stone release.  It should fall onto the towel.  Once you have the stone out you will remove the contact paper and scrub any cement off the top of the glass and then put the stone on some dowels or a rack so that it can fully cure.  This may take a week or so.

The widget below features diamondcrete, stained glass patterns, molds and a nice program for resizing patterns called rapid resizer.

Gathering your Stained Glass Stepping Stone Supplies

The first thing you are going to want to do is gather all the necessary supplies for your first stepping stone project. The basics that you will need are as follows –

1. Protective goggles
2. A good quality stained glass cutter & breaking pliers
3. Glass
4. A pattern from a stained glass book or your original design.
5. Carbon paper or a printer and a pattern resizing program. (available below)
6. A chisel tip magic marker, app. 3/16 of an inch thick
7. A work board (a piece of sheetrock is fine)
8. Clear contact paper
9. A stepping stone mold (obtained at your local stained glass shop)
10. Petroleum jelly or Pam or WD-40
11. Cement  (available below or see our article on how to make your own.)

In the box below you will find some stained glass stepping stone supplies. The molds are useful and the program called “Rapid Resizer” is excellent.

Making and Mixing Your Stepping Stone Cement / Mortar

Creating the best cement for your stepping stones is very important. Cement that fails or cracks will ruin a design that may have taken you hours to create. Using ugly cement takes away from a nice design. In this article we are going to cover three different cements that you can use. The first is Diamondcrete which is a commercially made cement just for stepping stones. The second is simple colored grout mix which you can get at Lowes or Home Depot. The third cement is our own formula that is inexpensive, very strong and easy to make in different colors.

Diamondcrete – this is a very nice product and easy to mix and use. To use it you simply mix in the proper amount of water and pour. It dries and cures into a nice almost porcelain surface. It comes in different colors which is very convenient. Also, since it is commercially made you can expect that each batch of the same color will match the last batch. Mixing instructions will be on the container. Diamondcrete is available for purchase via the widget below.

Colored Sanded Grout – this is an alternative to Diamondcrete that is available at you local hardware store. Make sure to get the sanded type. It comes in different colors which is nice. Most types are fortified with acrylic which adds strength to the stone. To mix just add water and mix either by hand or with a drill mixer.

Acrylicrete (our formula) – this is a high strength cement that can be created in different colors and has a compressive strength of up to 8000 pounds per square inch. It is made with white portland cement, sand, acrylic and color. The instructions on making this cement are available at the following link. CLICK HERE

Pouring your Stained Glass Stepping Stone Cement into the Mold

Once your stained glass pieces are positioned in the stepping stone mold you are ready to mix and pour your cement into the mold. You will pour the cement into the center of the mold slowly and let it fill to the edge. Once the cement has filled up the mold I normally vibrate or lightly tap the side of the mold to try and get the air bubbles to come to the surface and escape. Before pouring, make sure that your mold is in a place where it will not have to be moved until the cement has set and is ready to be popped out of the mold. If you move the mold you run the risk of allowing cement to get under the contact cement or under the stained glass pieces. Once you have poured the cement you need only wait until it has hardened and cured.

Make sure to read our article on how to mix your cement. It will cover the different types of cement including our free formula for high strength stepping stone cement.

The widget below features diamondcrete, stained glass patterns, molds and a nice program for resizing patterns called rapid resizer.

Greasing Your Stepping Stone Mold and Positioning the Stained Glass

After you have applied the stained glass to the sticky side of the clear contact cement you are ready to grease the mold and position the glass. You can spray with PAM or use Vaseline. Coat the inside of the mold liberally without leaving globs. Gently press the glass into the bottom of the mold so that you have a good seal. You are trying to avoid having cement get behind the contact cement. After this step you will be ready to mix your cement and pour your stained glass stepping stone.

The widget below features diamondcrete, stained glass patterns and a nice program for resizing patterns called rapid resizer.

Applying your Stained Glass Pieces to the Clear Contact Paper

In this step you will take your cut and ground pieces and apply them to the sticky side of the contact paper that you have laid down over your pattern. As you can see, the numbers on your pieces will match the numbers on the pattern. Again, for simpler patterns this is not necessary. Press them on firmly so that when the cement is poured it does not get under the pieces. Also, remember that the side of the glass that is against the contact paper is what you will see when the stone is finished. In other words, your design is now facing downward.

The widget below features diamondcrete, stained glass patterns and a nice program for resizing patterns called rapid resizer.

Numbering your Cut Stained Glass Garden Stone Pieces

After you cut your stained glass pieces you are going to want to number them so that you can properly arrange them prior to pouring your cement. If you have a simple design you can skip this step but for intricate designs this will make laying out the design easier. You will number the glass pieces with a marker as you cut them. The pieces are going to match up to the full size pattern that you will use to lay out the glass.

The widget below features diamondcrete, stained glass patterns and a nice program for resizing patterns called rapid resizer.

Laying Down Your Clear Contact Paper Over Your Pattern

After you have cut and ground you glass pieces you are going to need to arrange them on a piece of sticky contact paper. Clear shelf paper works great for this. You will lay down a copy of the pattern and then lay the contact paper over that sticky side up. Pin it down so nothing moves. Once everything is in place you are ready to apply your glass pieces to form your design.

The widget below features diamondcrete, stained glass patterns and a nice program for resizing patterns called rapid resizer.

Applying the Pattern Pieces to Your Stained Glass for Cutting

In this next step you are going to be attaching your numbered pattern pieces to your glass for cutting. Remember, to be more efficient, keep everything organized. You are trying to create a work of art, not a puzzle. At this point you should have your pattern pieces cut and numbered and also lettered to designate glass color. Now you are going to simply spray them with an adhesive and apply them to your glass. (a non permanent adhesive is best) Make sure to apply them so that they go with the grain of the glass. Also, make sure you apply them so that the side of the glass that you want showing on your stone is facing the correct way. You will need to think this through so you don’t end up with the wrong side of the glass facing out. If your pattern can be reversed with no adverse effects then it would not be the end of the world since you would just flip the design. In any event, proper planning will keep this from ever happening. Once you have attached the pattern pieces to the glass you will be able to cut the glass pieces out. I recommend that you use an adhesive that will allow you to remove the paper from the glass fairly easily.

Alternative Method – If you are going to be using a pattern more than once you may want to make your second copy that you cut into the pieces out of a material that can be reused.  I have used static cling vinyl, thick cardboard or LDP (low density polyethylene) with good success.  When I do it this way I normally trace out the pieces onto the glass using a marker and then cut using the traced lines.

I highly recommend the program in the panel below called “Rapid Resizer”. It is great for quickly resizing patterns. Also, if you choose not to use our free stone cement formula then you may want to check out “Diamondcrete” below as well.

Numbering Your Stained Glass Pattern Pieces

In this next step you are going to be preparing your pattern so that it can be attached to your glass for cutting. Organization of the project is important. To do this you will need to cut the pattern into its various pieces and number them. This is done so that when you get your glass pieces cut you can put the pieces back together to form the design. Otherwise you will have a puzzle. Here is what do. I make two copies of the pattern. I number both so that they match. Then I cut one into pieces. Now, when I get my glass pieces cut I will have an original uncut pattern to help me lay the pieces out for integration into my stained glass stepping stone.

I highly recommend the program in the panel below called “Rapid Resizer”. It is great for quickly resizing patterns. Also, if you choose not to use our free stone cement formula then you may want to check out “Diamondcrete” below as well.

Choosing a Stained Glass Stepping Stone Pattern

Your next step is going to be choosing which stained glass pattern you will use for your stepping stone.  Since the cement will replace the channeling, foiling or soldering your design can be simpler than it would have to be for a panel or other soldered design.  You can make it as simple or complex as you wish.  You will need to select a pattern that will fit well into a round, octagon, or tree ring mold.  Or which ever mold you happen to have.  Remember that the pattern does not have to be for a stepping stone, it just has to be able to be modified to work.  Be creative.  An electronic pattern like the ones in our “Stepping Stone Patterns” category are nice to use because they import easily into a graphics program for resizing or modification.  Printed patterns are fine also.  You can enlarge them with a copier or scan them into your computer and modify them.  When choosing or modifying a pattern keep in mind that small, glass pieces tend to be more stable and less subject to breakage.  Since your stones may be in the weather, this is important.

Once you have chosen your pattern you are ready to go to the next step.  One last thing.  In the product below we have some more patterns, some diamondcrete and also a program called Rapid Re-sizer.  The re-sizer program is very good and I highly recommend it.

How to Cut Stained Glass for a Stepping Stone

Cutting your glass pieces for a stained glass stepping stone.  (see video at bottom of page)

Lay the glass that you are working with on your work surface front side up. The front is usually the smoothest or shiniest side. Try to always work with this side. The rough side of the glass will not produce as clean a cut. Place your pattern piece on the glass. If you are using patterned or textured glass make sure you cut the piece so that the side you want to face up is correct. Hold the pattern in place and trace around it with a felt-type pen. Remove the pattern from the piece of glass and mark it with a number that corresponds with the pattern piece. That way you will know where it goes. Note: Always cut glass on the smooth side.

Scoring your glass: Stand in a comfortable position and hold the cutter like you would a pen or pencil and remember to keep it straight up and down on the glass. Dip your cutter in oil and then start at the edge of the glass that is closest to you. Place your cutter head on the glass approximately 1/16″ away from the edge. Apply light, even pressure to the cutter and carefully guide the head across the surface of the glass on the inside edge of the line that you created. There is no need to re-score over a line. Just one pass is sufficient. Going over a line multiple times can result in a bad breaking score line and can also damage the wheel of your glass cutter.

Start with your most difficult cut first and finish with the easiest cuts. Inside curves are the hardest , outside curves would rank second, and straight lines are the easiest. Cut complex pieces a little at a time instead of all at once. Once you have practiced and understand the limitations of glass, you will be able to score and break more extreme curves.

Note – If there are small flakes of glass popping up from the score line then you are applying too much pressure on the cutter. Try applying a little less pressure to your next score line. If you are not able to see where your score line should be then you are not applying enough pressure. A white score line is called a dry score and simply means that you need to add oil to your cutter.

After scoring your glass, you will need to break it. First, make sure you are wearing safety goggles before attempting to break glass. There are two basic ways to break glass. You may use your running pliers or breaker/grozer pliers. Always remember to break each score line right away before making the next score. Do not score across other score lines.

To break glass with running pliers, hold the glass with score side up. Place the pliers at the beginning of the score and line up the pliers with the score. Tighten the screw until it touches the lower jaw of the pliers, then loosen the screw a 1/4 turn. Gently squeeze the running pliers to run the score. If the score only runs part of the way, you can turn the glass around and repeat the process from the other end of the score line.

Breaking glass with breaker/grozers: Hold your glass in the hand that won’t be holding the pliers. (If you are right handed, hold the glass in your left hand or vice versa.) Form a fist with your thumb on the top of the glass and your fist under it. Your knuckles should be adjacent to the score line. Place the breaker/grozers (with the flat jaw on top) directly across from your knuckles and parallel to the score line. Hold the glass firmly and apply even pressure while snapping up and away. Again, always remember to wear safety goggles when breaking glass.

If your glass breaks unevenly, clean up the edges with breaker/grozer pliers. With the flat jaw of the pliers facing up, grasp small pieces and snip them off. If the pieces are too small, hold the pliers at a 90 degree angle to the edge of the glass and drag the serrated jaw of the pliers across the edge. If the edges of your glass piece is rough, simply smooth it out with your grinder. Since you are using the pieces for a stepping stone and not for a standard stained glass piece you don’t have to be quite as exact.

The widget below features diamondcrete, stained glass patterns and a nice program for resizing patterns called rapid resizer.

Introduction to Making Stained Glass Stepping Stones

Thank you for visiting our site.  In this series of articles we are going to cover all the steps involved in creating a stained glass stepping stone using the direct or embedded glass method.  This involves cutting a stained glass design, laying it in a mold and pouring in cement.  It is actually very easy and this series of articles will cover each step in detail.  The most difficult part will be cutting the stained glass, however, if you just want to do a mosaic design with glass pieces then even this step can be simple.  If you have a question about a step just post a comment at the bottom of the article. Next Step – Assembling your Supplies >>

In the box below you will find some stained glass stepping stone supplies. The molds are useful and the program called “Rapid Resizer” is excellent.